Battlefield Bad Company 2 is the all new hot game from Battlefield Series.This game is developed by the swedish farm EA Digital Illusions CE and published by EA Games.The Battlefield Bad Company 2 is based on the fictional missions carried by US commandos.
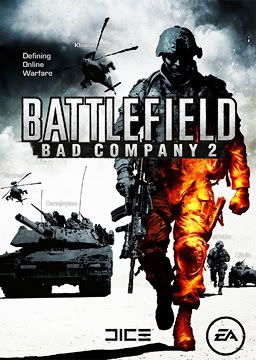
The main attraction of Battlefield Bad Company 2 is that it is highly realistic game with real time game effects.During playing you must feel like a Commando worried about your duty and mission also enthusiastic.
Battlefield Bad Company 2 Minimum System Requirement ::
CPU : Intel Core 2 Duo / AMD Athlon 2 or betterGraphics Card : Nvidia GTX 9800/ ATI Radeon HD 4770
RAM : 2 Gb
Hard Disk : 10 Gb
Direct X : 9 or better
OS : Windows 7/Xp/Vista/ Mac
Objects ::
There are three different type of object you have to play with in Battlefield Bad Company 2. The first thing is your Weapons. About the weapons you can say that you will have everything needed in your backpack. Lots if heavy gun, Rifles , pistols, and grenades. Some special equipment also can be helpful. But only one thing to remember at a single instance you can have only two weapon.
The second object you may find sometimes lying around which is a Vehicle.The vehicles are very useful object during playing the game Remember if any vehicle in any mission is in your line of site then always try to run to it at first. It will provide you a heavy defence and also a serious offence. The vehicles may be a Truck , Jeep, APC or a Tank.
The last object you need to keep track is the Covers and Destructive objects. Covers can be woods, Stone, Hills, rocks,concrete walls which are undestructable cover.But when a rocket is coming towards you you better run. Then some destructive object is also there which may be Barrels.
Characters ::
Private Preston Marlowe
In the major part of the Battlefield Bad Company 2 , the player controls Private Preston Marlowe. Marlowe is part of a squad formerly representing a company in a fictional United States Army battalion known as "Bad Company".Marlowe had joined the army declaring "Runs in the family, I guess.".After crashing an attack helicopter into a general's limo, Marlowe is sent to the 222nd Army Battalion, or "Bad Company" in the original game, and returns with the squad in Bad Company 2. Private Terrance "Sweets" Sweetwater
Private Terrance Sweetwater, is the technician of the squad. Having a keen sense for technology, he expected not to do any fighting, but after being sent to Bad Company for uploading a virus to the US military mainframe, he hoped to get out as quickly as possible.- Private George "Hags" Haggard Junior
- Haggard joined the army to deal with his pyromania. After blowing up "the biggest ammo dump east side of Paris", he was sent to Bad Company where he serves as the squads demolitions expert. He does not seek to get out of the army anytime soon.
- Sergeant Samuel "Sarge" Redford
- Redford was the first person ever to volunteer to join Bad Company after being promised early discharge from the army. After the first mission "Cold War" and retrieving the "Aurora" scalar weapon device, which is revealed to be a fake soon after, Samuel's service time is extended to find an agent named James Aguire, who is mentioned below. He is promised release many times, but his stay is extended when more complications arise.
- MISSIONS:
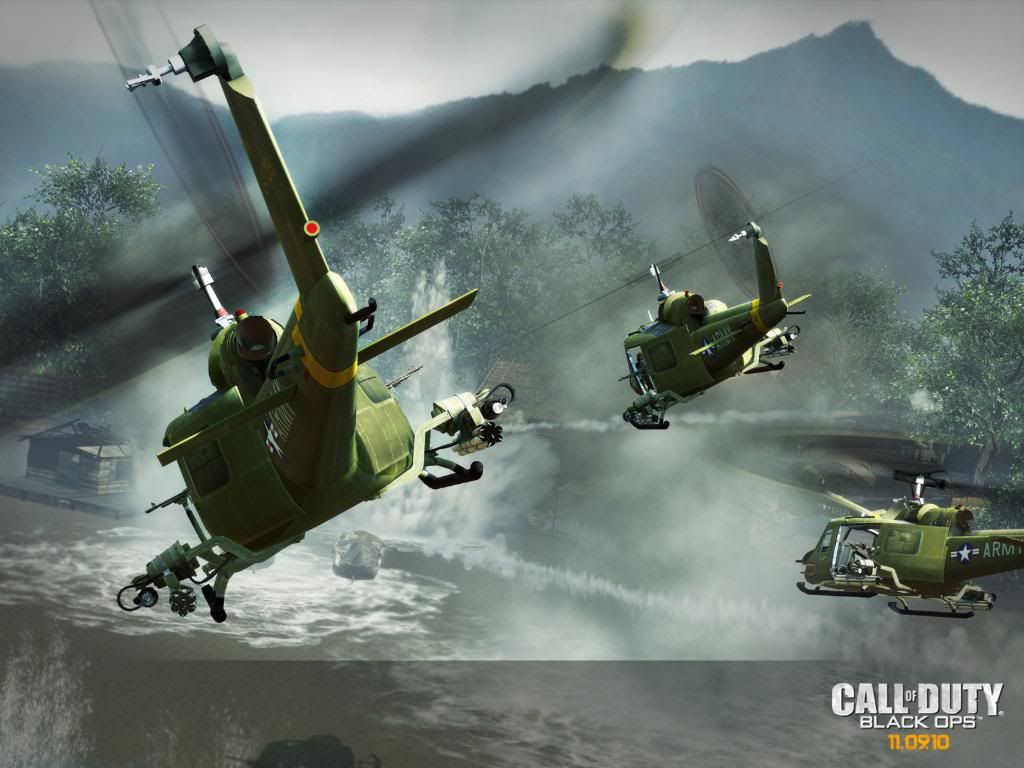
- Battlefield Bad Company 2 has 13 missions... "Operation Aurora" -"Cold War""Heart Of Darkness""Upriver""Crack The Sky""Snowblind"" Heavy Metal""High Value Target""Sangre Del Toro""No One Gets Left Behind""Zero Dark Thirty""Force Multiplier""Airborne"WALKTHROUGH ::A complete walkthrough of Battlefield Bad Company 2 as I played myself in my Alienware M17 X.Mission 1 : Operation Aurora ::
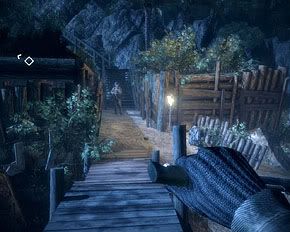
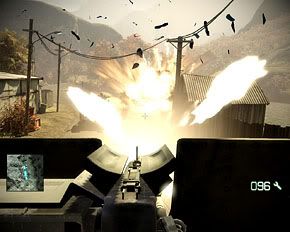
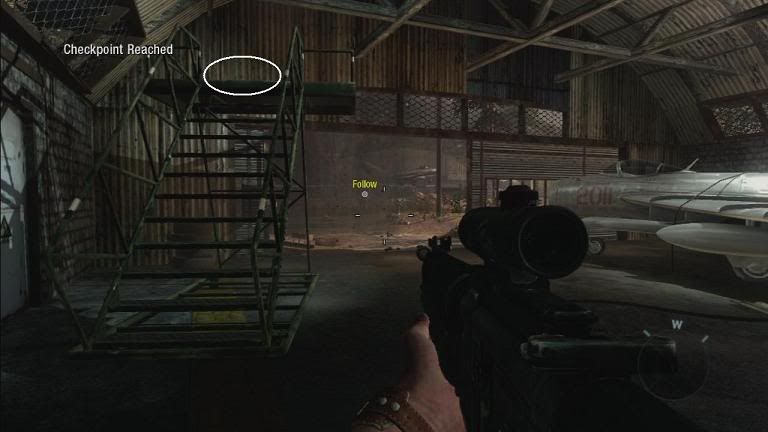
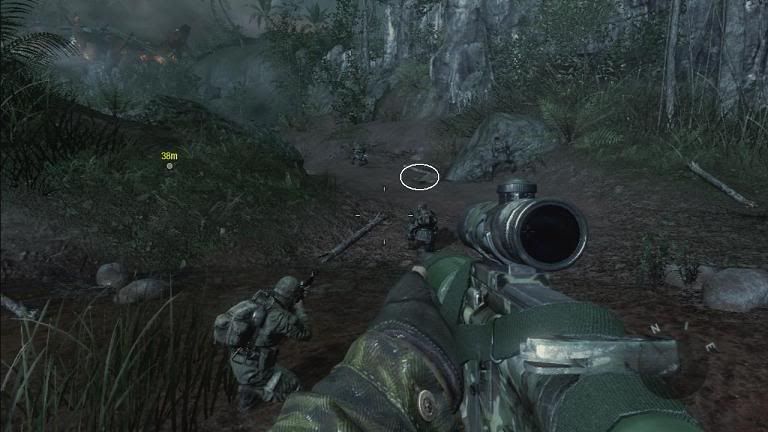
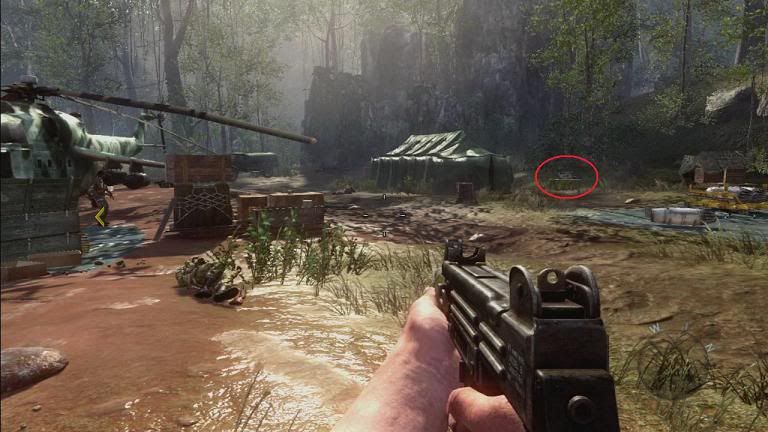
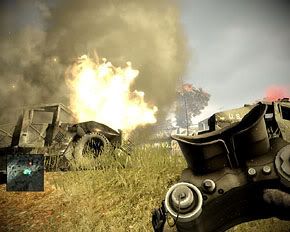
 Move towards your first target quietly and perform a melee attack. In the trenches, you'll get your first gun.You'll want to shoot in short bursts so as not to waste ammo. Rush across the bridge and be careful to avoid falling debris. Now move through the trenches, get out from cover and line up your shots carefully and take enemies out one by one. Get out of the trenches and follow your friends, take the rope ladder up and follow your squad to the field. After the air strike, take out the stragglers directly across from you and continue across the bridge. Up the stairs, and across a bit of jungle, you can spot the enemy airfield. Take cover and open fire. As long as you don't rush in, this is easy. Make your way forward bit by bit and round the corner to the right to get to the vehicle. Tips : Do not waste your ammo and stay alert to the environment objects. Tips: Follow your friend and be quick playing guns. Mission 2 : Cold War ::
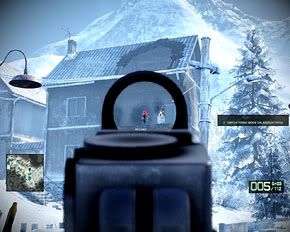
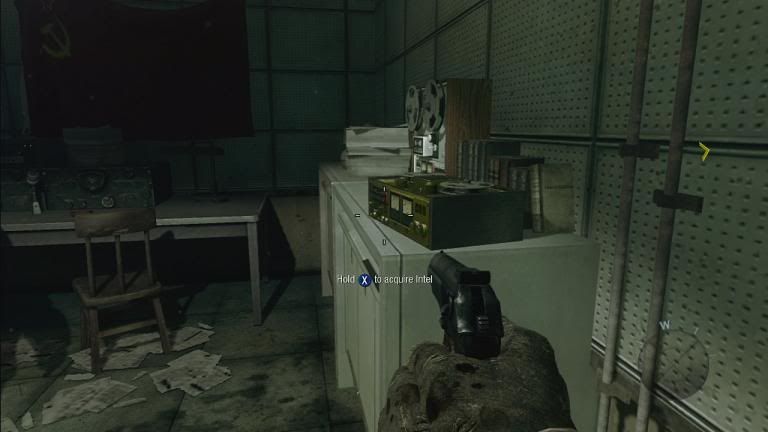
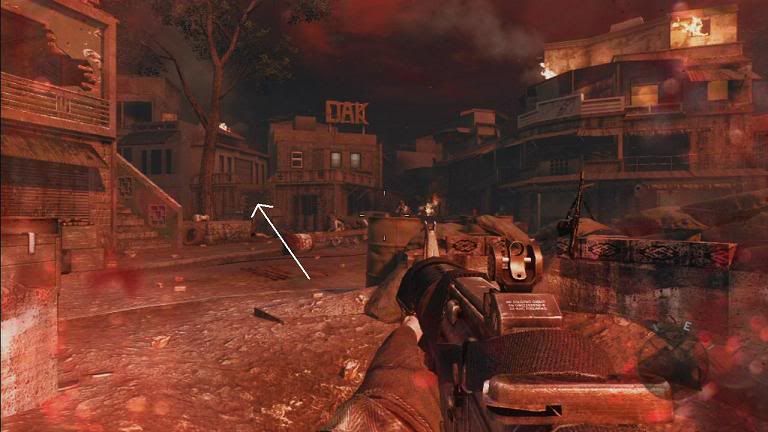
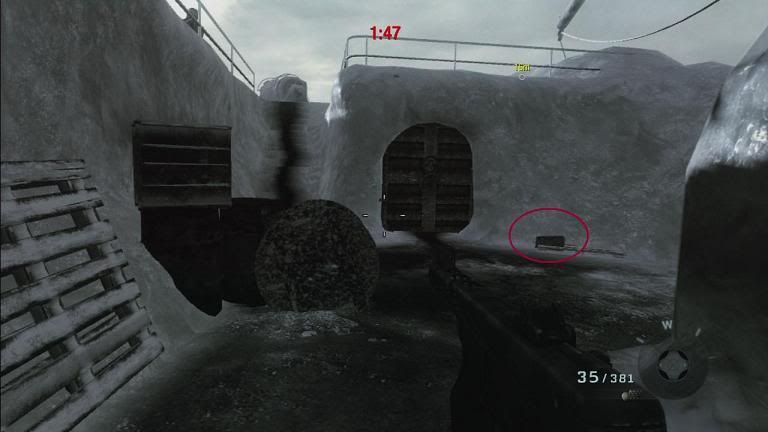
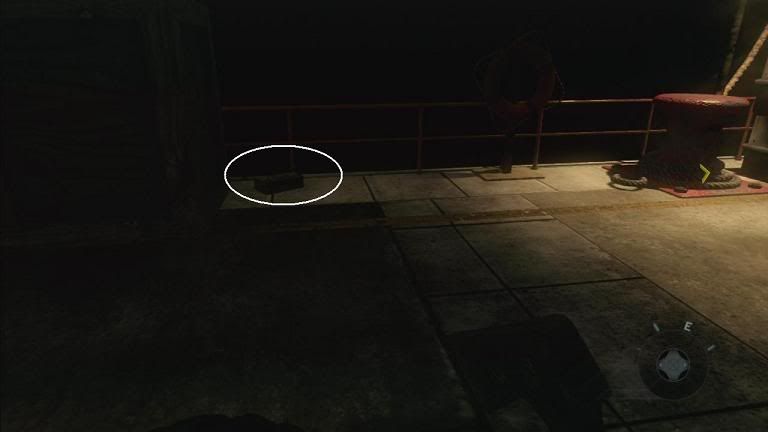
 Head to the ledge and wait for the signal before you shoot. They go down easy. One of them drops a Collectible AR-9.Now keep going.After this, head up the steps and take cover as the enemy vehicle approaches. Switch off to your grenade launcher and take out the turret first and foremost. The soldiers go down with relative ease. Take care once more as you advance, as a troop with a rocket launcher is sitting on the second floor of the damaged building up ahead.Move up bit by bit. The enemies keep coming. Eventually you reach a small urban area, and things get a little more interesting. This part has room for multiple approaches. The buildings make good cover, but not so good that the walls can't be blown out, so it's not generally advantageous to just camp on a top floor. If you crawl around the east side, you can slip through the alleys and hit enemies by surprise while the other men in your unit distract them.After you get the go ahead, approach the target point. A tank shows up. Run immediately, through a building if possible, and get back with your squad. Bide your time as the tank slowly approaches, and take cover, shooting any troops that get too close. After the minute is up, you'll have to get the tank in your binoculars to call in the strike. Once they hit, your troubles will be over. Tips : Cover your ass when needed. Tips : Use your guns pointer vision to aim correctly. Mission 3 : Heart Of Darkness ::
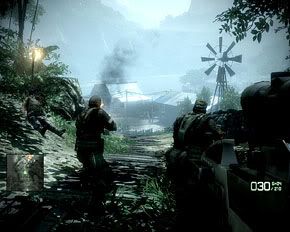
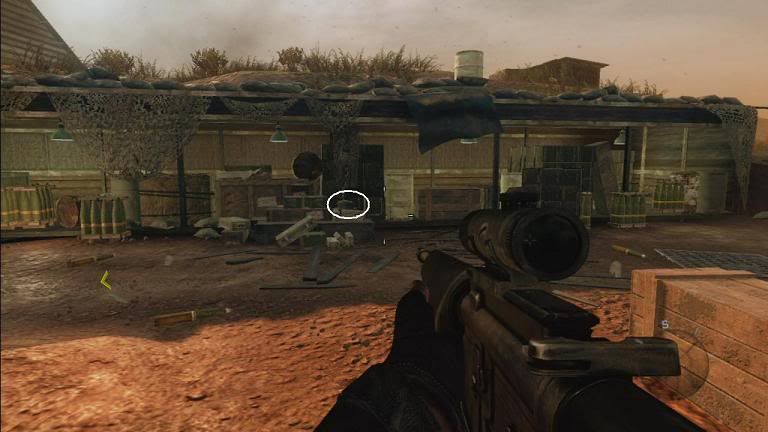
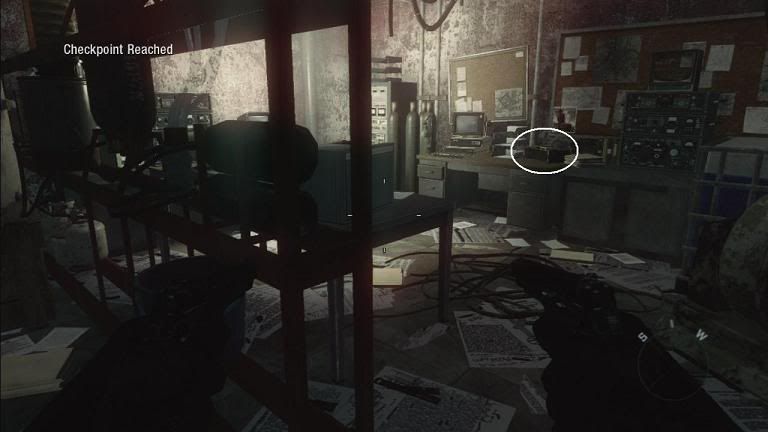
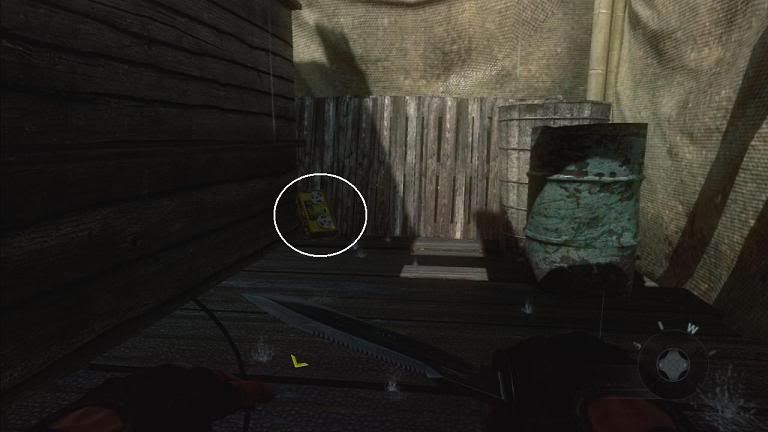
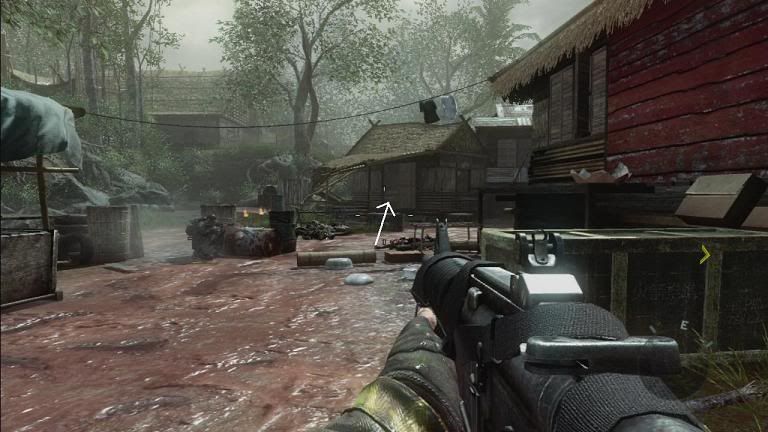
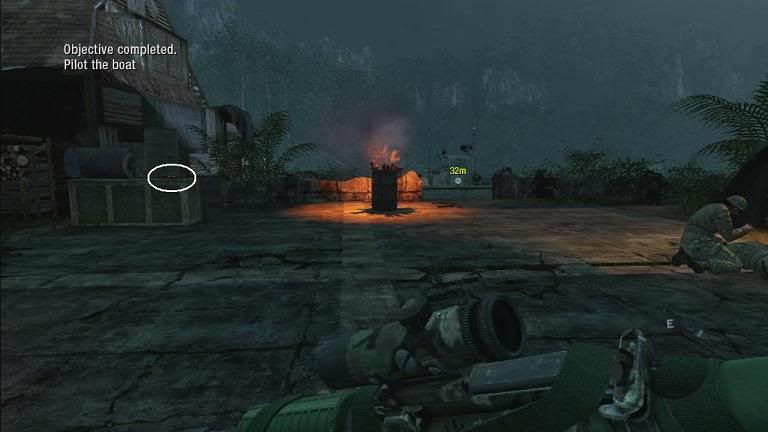
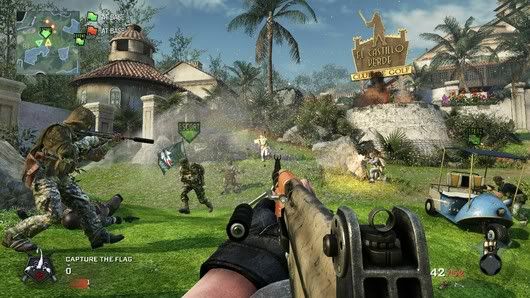
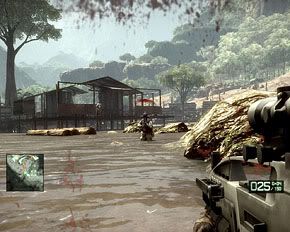 Head into the camp. There are bodies strewn around. Be sure to search the bodies for guns near where you make the first left turn in the camp. Just beyond is a cut scene.There's a firefight now. Stay put and keep behind the sandbags. The cover in this fight is highly destructible, both the enemies' and yours, so you may have to move around a little bit on the deck if your cover is blown. Take special notice of the guy with the RPG on the terrace above, dead-ahead. Get him while he's reloading. After all of them are dead, a gunboat shows up. Run up to the terrace with the guy with the RPG was and use it to take down the boat.Grab the small motorboat and hang a right, up the river. The ride is suspiciously quiet. Eventually you'll run aground. There's an ambush. Get behind a rock and take them down as quickly as possible. Shotguns are good here if you have one. Once the coast is clear, keep to the left and find the small path to the shack with an M-Com unit in it, and blow it up (this is for achievement purposes; M-Coms do not need to be destroyed to progress).Head along the east edge and up the stairs. At the top, blow the M-Com. Now follow along until you get to the next boat. This is a long bit until the next checkpoint. The river is narrow, and although this boat can fire, there's no need. When you get to the lumber yard, things open up a bit. Camp near the rocks and take out the initial wave with an assault rifle. There are a lot of ways to move forward from here. The best is to head along the eastern side by the unmilled lumber piles. This is not only the best "hard" cover in the area, but you'll have a clean crack at the enemies running across the open fields to the east as they approach.When you approach the next camp, get a rocket ready if you have one. There's a pretty obvious, well-covered spot to camp. The first wave of enemies run right known the middle. These guys are sitting ducks if you're quick. Once you've gotten these guys out of the way, you need to clear the buildings. Go down the right side and take the stairs. If you run down the middle, you'll get hit from both sides. The end of the level is just beyond. Tips : Take care of your cover and kill the RPG guy as fast as possible.Mission 4 : Upriver ::
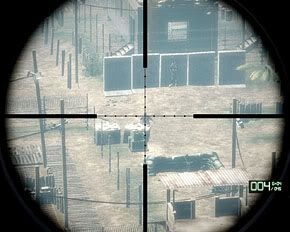
 Approach the sniper and take him out with a melee attack from behind. Now you have to do a little sniping. Mask the sound of your shots by timing them with the thunder claps. The timing is pretty generous, so you can generally get two enemies with one clap. The last two enemies can be taken down with a single bullet.Before you catch up to you squad, search for an M-Com in a hut near the water. Rendezvous with your squad and move ahead slowly. It helps tremendously to be able to spot the traps here. They look like wires with vines on them. Even if you don't have a good eye, if you move slowly you'll see the prompt to disarm them when you get near. When you get to the camp, clear the building on the right first. Stick with your squad and follow along. This is very easy. Now walk along the cliff wall until the cut scene. Snipe the guys in the towers after the cut scene and then drop down to help your squad clean up. Head into the creek, and stay to the sides. There's some moderate resistance here. Stick to the basic assault rifles and use the rock cover along the edges.Hang a right at the end and come back around the other side. There's a little bit of enemy action here that can be taken out at long range. In the building at the end (not far from the bridge) there's an M-Com and cut scene finish.
 - Tips : This is a sniper mission so just keep your eye on the binocular.Mission 5 : "Crack The Sky" ::

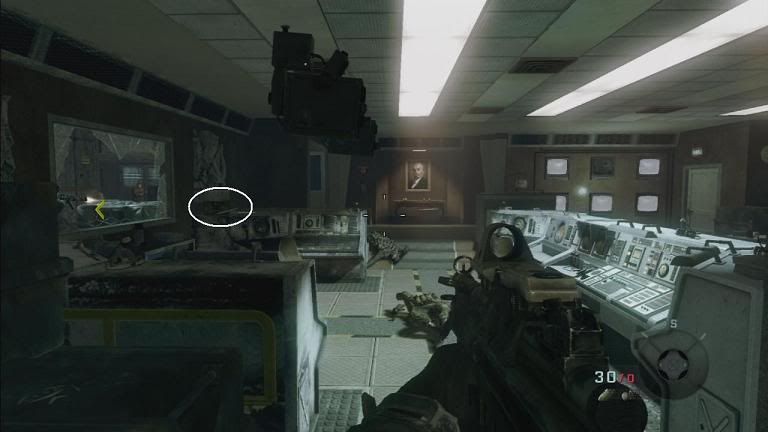
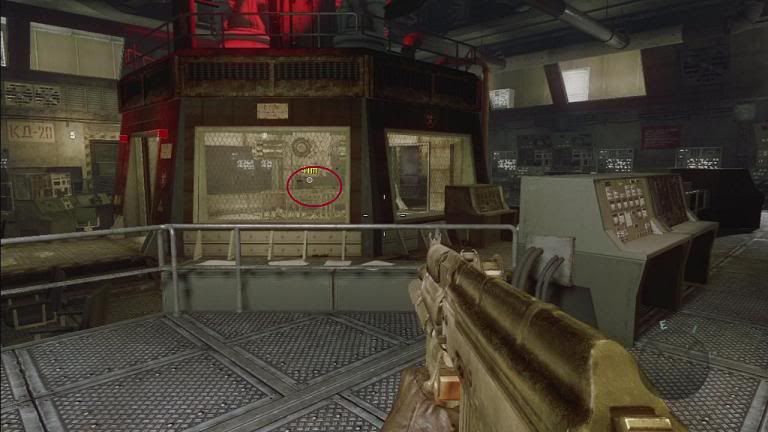
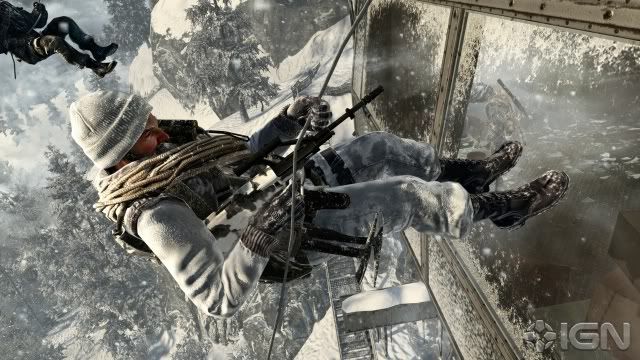
 The mission begins with a rail shooter bit. Keep the trigger down and target the trucks and gas tanks first. The individual enemies tend to bunch up, which makes things a bit easier. It's not a terribly long fight, and before long, you'll be dropped off.Head up the stairs for a bit and pick up the rocket launcher along the way. Take cover behind to do some longer range shooting. Take out the minigun on the upper level and crouch behind cover while you clean out the rest. At the top, you can go right, but you should go up the stairs and take out the M-Com Station first.Around the corner you'll reach a few buildings. Prepare for a big firefight. Take cover behind the concrete dividers. A helicopter drops off the first wave of enemies on the roof, and you can pick off some as they slide down the ropes. Don't move in until you've cleared this initial wave. You'll also want to take out the enemies rushing in on the right side of the building. When things die down and your squad advances move inside. Expect a couple scattered enemies on the interior. When you reach the control panel, activate it.After the cut scene, follow your unit to the ledge and begin firing at the enemies on the rooftops. Shotguns work well to push through the narrow approach, and stop off in the gaping building on the right, but when things open up, switch back to assault rifles and quickly take down the guy with the RPG on the rooftop.Grab the shielded minigun to do a little cleanup. Get some very solid cover for the next part and don't advance until the coast is clear. Grab the minigun again, and focus your fire on the APC's gunner and then find the guy with the RPG on the rooftop to the left.Now you can make it to the jeep below. Before you board it, check the building on the left for an M-Com. What follows is a lengthy driving/shooting sequence. The real trick here is to keep your speed up so you don't have to deal with trouble from behind. This is a little tricky because of the obvious visibility issues, so it might take a little practice, but the key is more the driving than the shooting. Tips: Stay calm and understand the mission objective.Mission 6 : "Snowblind" ::
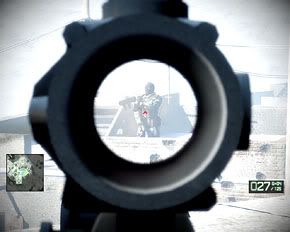
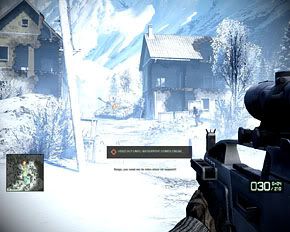
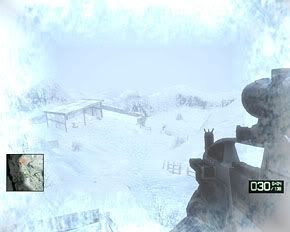 Follow your unit until you hit the short cut scene. It's easiest to use the buildings for cover, but the enemies aren't that smart and an aggressive move can work as well. They'll be marching up the road from the southeast. Watch the rooftops for RPGs.A second wave comes from the north. You can dig in with your unit along the wall. They come in much the same configuration, but this wave seems more controlled. Once again remember to mind the rooftops for RPGs. There will be a lot of them to the right of your unit. There's also an ammo crate over there with an RPG if you need it. And you do.Once the two waves have been wiped out, a helicopter moves in. You want to take this down as fast as possible. Fire your rockets at it in scoped mode. It has a simple pattern of moving and then stopping while it attacks. Hit it when it's stopped, of course. A couple solid, direct hits should do it.The trek down the mountain is long, repetitive, and the checkpoints are spread out, so try to play defensively so you don't end up dragging it out even more. It's cold out and you need warmth. Inside the buildings, there are fireplaces to warm your bones, and you'll periodically see explosive barrels which you can pop to create a fire and stave off frostbite. Shortly after the first checkpoint you can find an M-Com to destroy.Your instinct might be to use assault rifles here, but the visibility issues make long range fighting less appealing and there's a lot of stopping indoors, so we had better results with shotguns. When you reach the more urban part, try to stay indoors as much as possible. When you cross the bridge, use the ladder to get to the roof of the building on the right to get an M-Com.Eventually you'll reach a rescue chopper. It'll fly off and position itself over a two story building. Ready the shotty and head in (the hole in the left side is probably safest, but it doesn't really matter). Head up the stairs and out on the balcony to make your way to a ladder up to the roof. Tips : Use your gun telescope nicely , you can see your enemies.Mission 7 : " Heavy Metal" ::
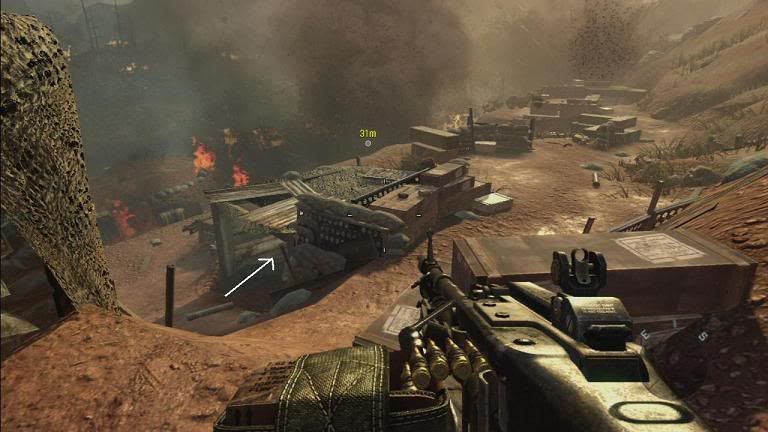
 Time to bring out the big guns. This is a tank-based level. The road is pretty linear. Hang a left at the tank obscuring the road ahead. The first objective is cake. You can dominate the infantry and then move in on the installations, marked on the map. They should go down with one direct hit each. Move on to the next point. Keep your distance as there are rockets flying. Just pound the building. It's a destructible structure so finesse isn't needed. When it's done, you'll get out on foot briefly. Go to the control panel and activate it. You can take a detour here to find an M-Com under a sniper tower near the closest windmill. Keep the drone moving to avoid the rocket fire. The priority targets are marked and need to be hit with guided missiles. Keep the reticule over these targets until the missiles hit. The infantry can be mowed down using the gun (alt-fire). When the targets are all destroyed, this sequence ends automatically. Now you have to fight other tanks along the road to the next checkpoint. If you aim the turret sideways, you can strafe back and forth to avoid enemy fire, but it might be more beneficial to just move in, particularly if you're not a very accurate shot. Two or three direct hits will finish a tank off, but if you're further away, you might be dragging it out.You get out of the tank again. You have to tag the marked targets with your binoculars to call in airstrikes. Hide out behind the nearby friendly tank for cover and pop out to tag and then get back under cover while the fun happens. After each strike, the targets become available again. It takes around a minute.When all the targets are eliminated, you get the call to move in on foot. Catch up with your unit and stick together. You need hard, high cover, like the protruding pieces of concrete or the damaged building on the right. Bust out the RPG and take out the shielded gun on the roof immediately. After this, you can bust open the walls of the building to leave your enemy exposed if you like. Left of the big gun, you can find the second M-Com. Once the coast is clear, the level ends.
 - Tips : Understand the navigation of the tank and eliminate the targets swiftly.
- Mission 8 : "High Value Target" ::
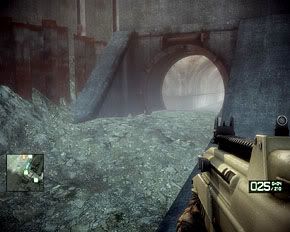
 The first stretch of this level is a pretty linear rail-shooter sequence, and there's not even a ton of action at that. You have to hit infantry with rockets, which can be a little tricky, but you can zoom in just like with a rifle for pretty good accuracy.Eventually you'll get out of the hummer and have to tag a building for destruction, just like in the last mission. You can back down the hill for good cover. This is very easy. Afterwards, you have to go ahead on foot. There's a supply drop. Grab a shotty. Go forward one building and look right, and you can find an M-Com in a fenced off outdoor area.Now you're running through mortar fire, so hustle. There are a couple scattered enemies. Shotguns work well and you can find a couple lying around. When you run into the house and then come out, you can quickly mow down four guys.For the rest of the level, the enemies tend to bunch up and they're busy fleeing, so they're not that occupied with killing you. Right before you get to the sewer you can find an M-Com in the water. When you enter the sewer, it gets even easier because they have nowhere left to go. So ends this very small stage.
- Tips : Use the hummer properly look out for targets.
- Mission 9 : "Sangre Del Toro" ::
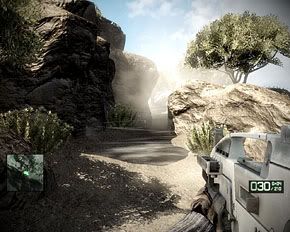
 Hop in the jeep and take off for the first marked point. You don't have to exit the vehicle. Three more points will spawn.Let's take on the northwest one first. It's a narrow canyon with a lot of wind and dust that really hurts visibility. You have to progress very carefully, sticking close to the canyon walls and rocks for cover.After a bit, you'll hit a supply drop, which you should use to make sure you have a solid assault rifle, if you don't already have one. Cover is very important since you can't really see too well, but luckily there is plenty of it after you drop down.Eventually you will come to an area where you can see a wall and enemies will begin attacking from high ground. Stay covered until you've taken a few out. When you move in, make sure to take out the Red Beret behind the sandbags on the left. At the top of the hill is an M-Com Station.The choppers show up after this. Use the little mounted rocket launchers. You need to maintain a lock on the copters to guide them in. It's not hard, but these launchers have a pretty limited vertical range, so wait for them to get low. Afterwards, a few more enemies move in so take up a defensive position, but it's not really that hard. Once you take out these initial guys, it's a leisurely stroll to the checkpoint, and then you can hop in the jeep and drive to the next goal.
- Tips: Lock the chopper fast and easy destroy them as soon as possible.
- Mission 10 : "No One Gets Left Behind" ::
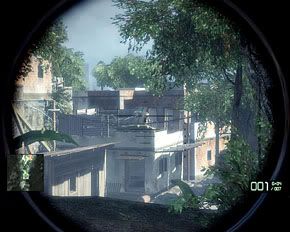
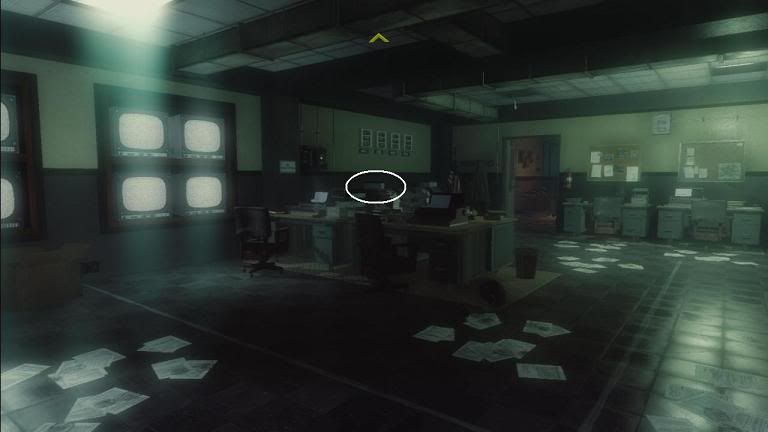
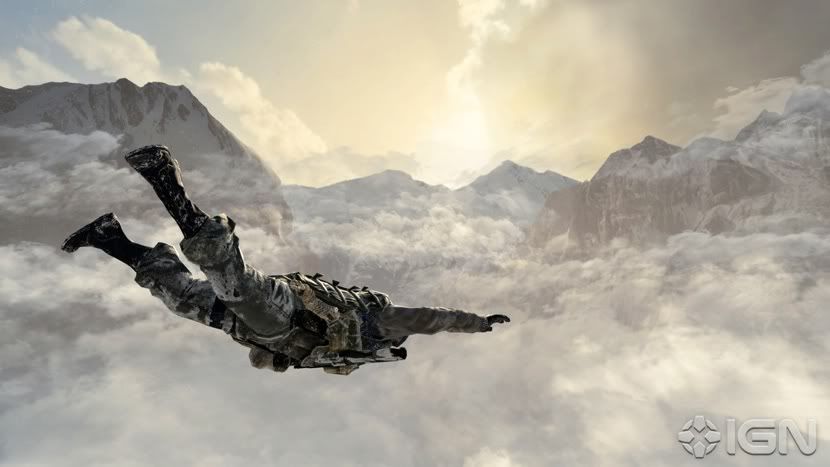
 Just steer your drop into a clear zone, nice and easy. Keep from drifting out of bounds. Once you land, it's a leisurely, unobstructed hike to the next cut scene. When you reach the clearing with the shacks, look on the left outside for an M-Com.Now we have another sniping segment. Listen to the audio cues from your partner and take cover behind the window. There's not a great deal of technique to this, just skill. With the slow reload rate, accuracy is very important.A tank shows up after this. There's a supply drop between the two shacks. Grab a rocket launcher (and some kind of assault rifle for later). A tank is heading up the road. Stay back and stay covered and drop two rockets into it. Now clean up any stragglers with your assault rifle and head on down the road.It's not a very interesting walk. When the path widens pick off the two guys on the ledge. This house has an M-Com as well. You're in the clear till the cutscene.After the scene, you'll find yourself on a cliff overlooking a large camp. You can actually clear this camp from this location. Use your sniper rifle to pick off the enemies below, starting with any rocket troops. From this location, the supply drop itself makes for perfect indestructible cover so you're not in any real danger. Doing things this way isn't as exciting, but it's easy and effective. Grab a rocket launcher from the drop if you need one. Head down below. Even though you cleared the area, a few more troops will spawn with an APC as you head down the middle. Rip a couple rockets into it. If you left the other APC intact during the sniping sequence you can hijack it and speed up the ride to the next checkpoint. There's an M-Com in this compound, as well, near the water towers in a building.
- Tips : See through your Gun's little telescope you can see enemies from far reach.
- Mission 11 : "Zero Dark Thirty" ::
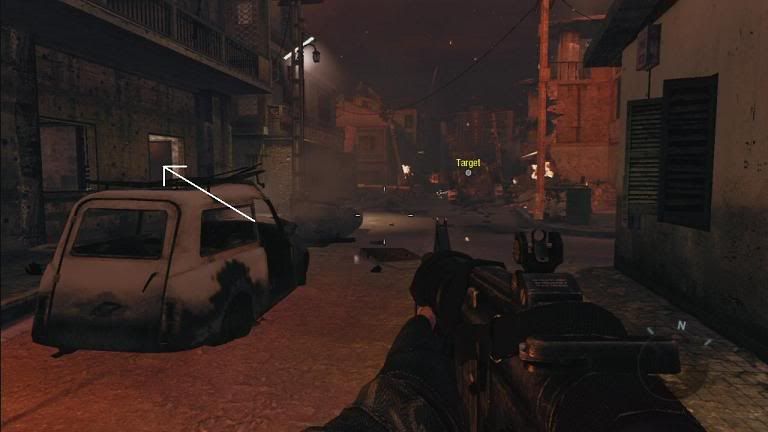
 The path is clear initially. When you reach the village, bust out the RPG and fire one at the shielded machine gun on the roof. With this gone, you can fall back for cover and pick off the remaining guys with an assault rifle. There's an M-Com to the left on the high ground near a pair of sheds. It's a bit hard to spot at a glance.Drop down, and as you approach the narrow alley to reach the turn ahead, use the RPG to pop another shielded gun on the top floor before it sees you. As you move in, there are a couple more that will show up on the roof right across from you. Don't move in too aggressively, because the guys hiding on the roof to the right can mess you up, especially the guy with the rockets. You'll need an accurate weapon to fight effectively here. An F2000 works, as does a sniper rifle.This segment goes a long time without a checkpoint, which is very obnoxious, so don't be afraid to fall back frequently and play defensively. The enemies have a pretty narrow approach up a flight of stairs in the last part, so try to bait them into the choke point and then mow them down. This is especially easy once your squadmates are in position.After the scene, you'll start taking heavy mortar fire. The only real strategy here is just to sprint as fast as possible to the next checkpoint. Not very realistic.
- Tips : Keep your ass out of trouble by the firing mortars and run as fast as you can.
- Mission 12 : "Force Multiplier" ::
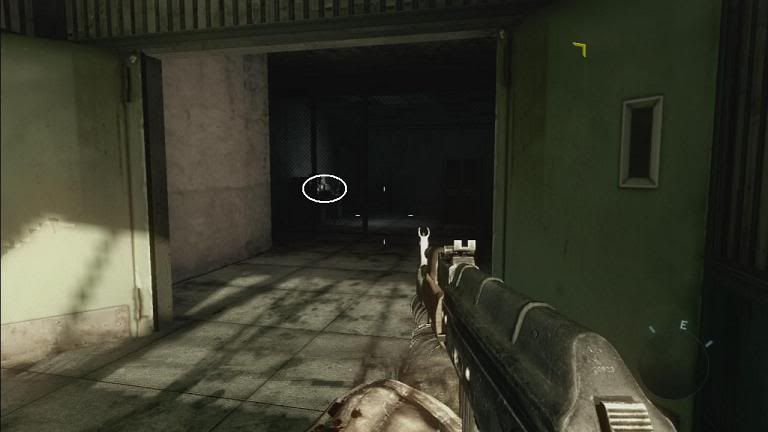
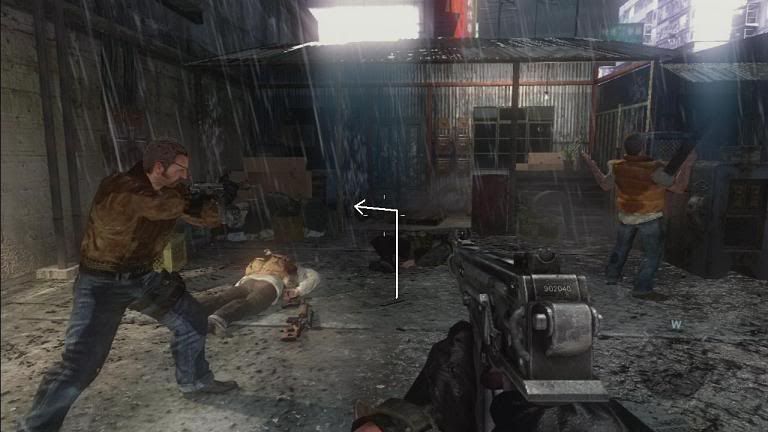
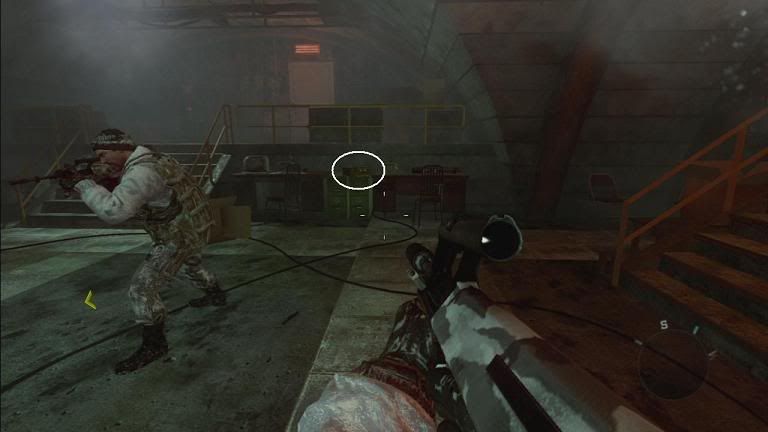
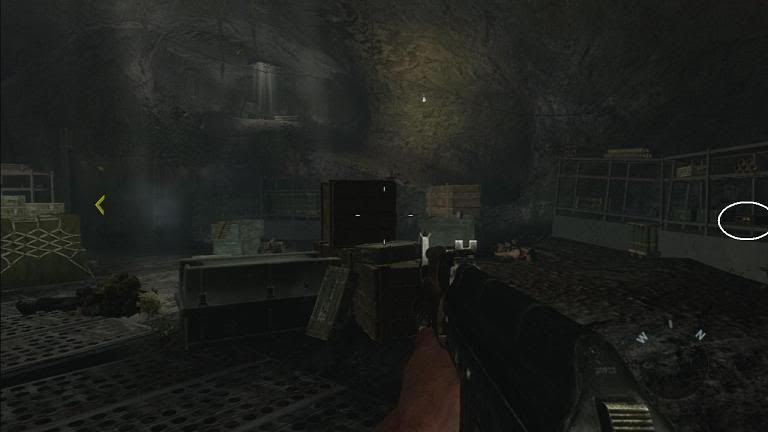
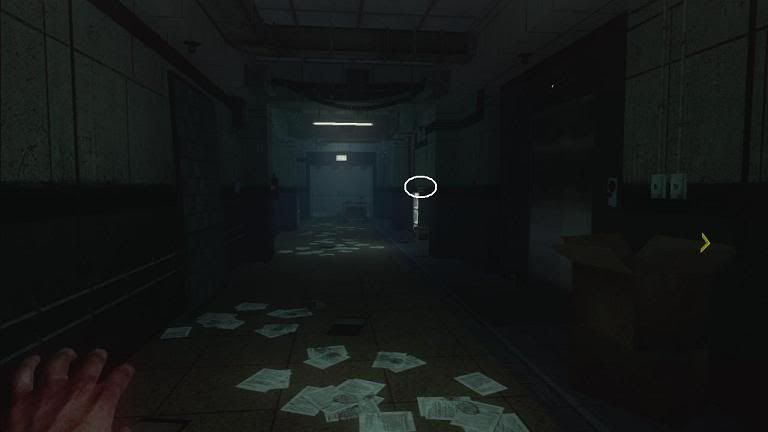
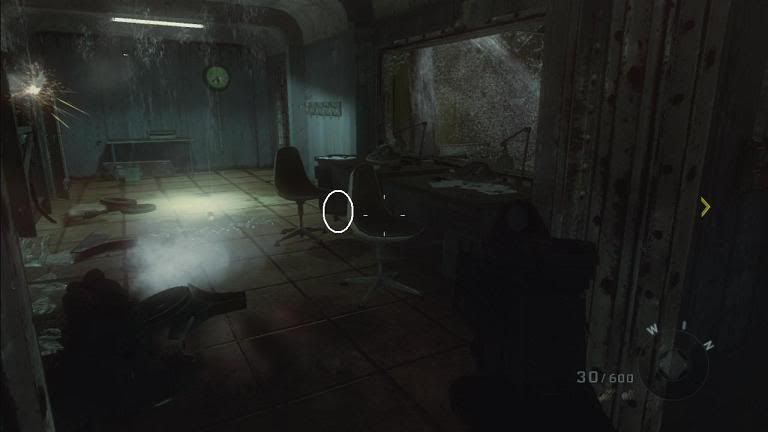
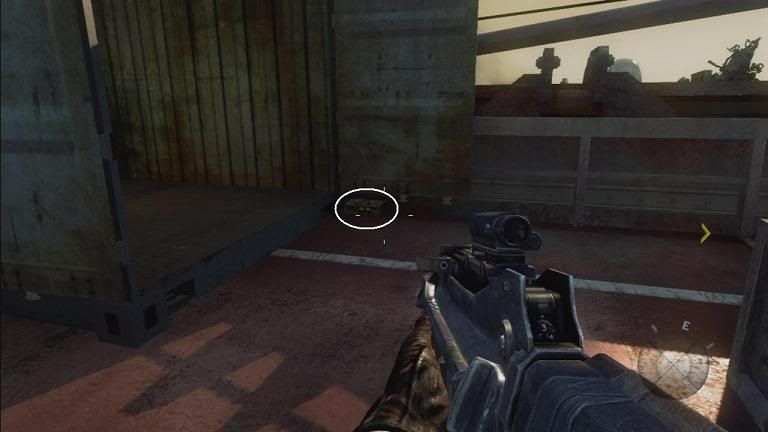
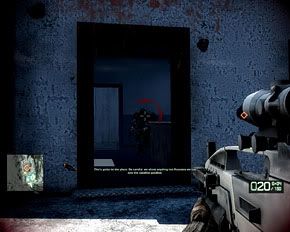
 This first segment is reasonably tough. You're stuck on low ground and you have to fire at the partly covered enemies to the right on the ledge above. Stay low, stay covered, and check up ahead periodically so you don't get ambushed from the side. They won't come from behind if you're thorough. When you get to where the road turns proceed very slowly and fall back for cover if you need be. This is something of an ambush so try to kite the enemies out one or two at a time.Now you head inside to the wrecked building. The first few enemies are easy. There's an open metal container that acts like a choke point. Use this to your advantage and mow down the enemies that come through, but also proceed carefully through it after, because there are a couple enemies perched on high ground to surprise you.Go upstairs. There's a cut scene, after which you'll need to hustle through the sewers and up the ladder to the level's end.
- Tips : Small mission , stay low and lookout for some ambush.
- Mission 13 : "Airborne" ::
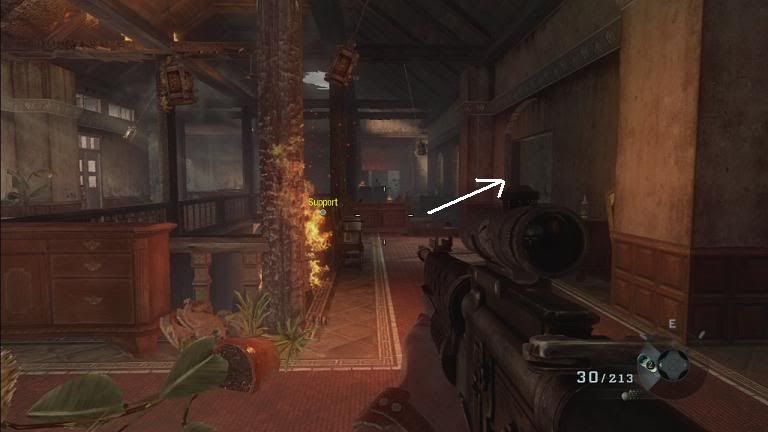
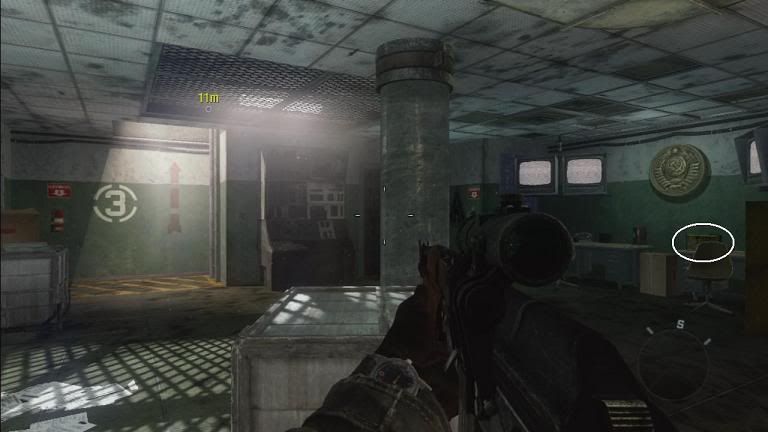
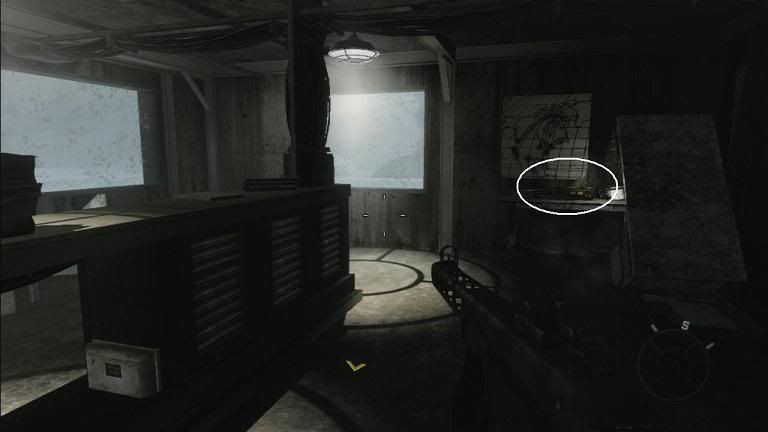
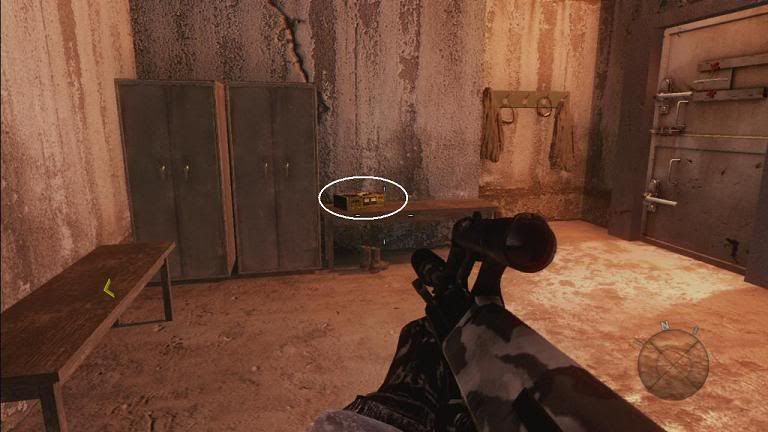
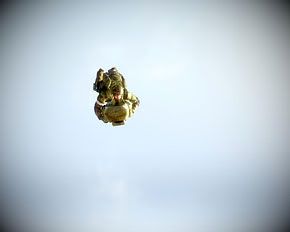 Run toward the first guy and knife him quick. Don't try to sneak, there's no way. Grab the gun and mow down the remaining guy, who only has a knife. Upstairs you can grab some ammo and hit the first checkpoint.This next stretch is pretty easy. Just through the door a bunch of enemies rush in, but you can take them out while they're bunched up. After a quiet stretch you have to do some mid-range fighting. This is a little trickier due to the shaking of the plane, so get cover before you open fire. The next checkpoint isn't much further, and there's a brief cut scene.This next sequence is challenging, but fun. You have a new gun to play with, which is very powerful, but not great at longer ranges. The cover in this part sucks, so you need to find corners to hide in between seats, and make sure to take time to recover before storming each door.The next part is simple, just fire at the big sci-fi orb. Afterwards you'll have to parachute. Take some shots and Mr. Clean, and then move over to grab the chute. That's all you are finished.
- Tips : Be quick and stay sharp at last take a clean shot to Mr. Clean !!